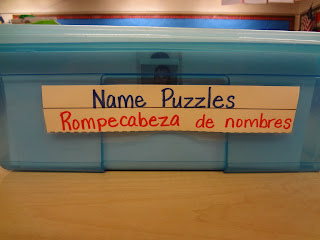
It's called a Name Puzzle; I keep my class set in this box, labeled so that they get their own. Everyone knows what their face looks like, right? :o)
Each laminated envelope has their face clear taped to it for them to identify and choose. (I believe in enabling my students to be self-sufficient in every possible way. It takes more planning and creating but it is super awesome in the long run!)
let me preface this by saying that I LOVE VELCRO!! I have that stuff all over my room! It is clean, fast, and neat! Anyway, so I put velcro on the envelope flap so that they close and open easily without having the puzzle pieces slip out.
They take it to their seat and take the pieces out and the example (green) (all those parts are laminated as well. I also live off laminating things. It makes a good idea last forever, then it becomes a genius idea!) The child uses the example to see what the finished product will be like. Then they have to arrange the letters in that order. This one is cut up into syllables, not each letter. After the child has become more proficient in creating and writing his name, I cut it down to each letter.
To me it is very important that the child see their name written in correct print. They are learning the shape and formation of letters now and need the structure of a specific guideline....later on they can develop their own writing style. Penmanship is under-rated.
After they arrange it correctly, they get a slip of paper from a stack that I have made ahead of time. They are to then copy their name onto it with crayon. The puzzle pieces come in handy because you can isolate 1-2 letters at a time for them to copy. This is my example ....theirs will probably not look like this. :)
After the first copy they write they choose a different color and trace over the previous color, and then again a third time. So that you end up with 3 colors - Rainbow Name!
For the struggling student, I have them trace the example with crayon. (crayon writes just fine on laminated surfaces and it wipes off with a firm rub with a Kleenex) Then they can move onto the copying on the slip of paper.
They take their Rainbow Name home and they put everything else in their envelope and back into the blue box for the next day! :)
Here are pictures of my students work baskets (work supplies). A great way to, again, make them self-sufficient. It also makes my life easier too. :)
Two students share a work basket. Their name tags are attached with velcro (they use these for center time as well) In the basket they find everything they need to work at their tables:
 |
| Name tags |
 |
| Glue for each person. |
 |
| Scissors and pencils for each person as well. |
 |
| And of course the mandatory set of crayons. (actually two boxes in each can) These cans are recycled baby formula cans. perfect size and height. :) |
Everything has a place and everything in it's place. ;)
Here are my Writing Journals for each child:
This I attach to the first page so that I can easily keep track of their writing progress over the course of the year. I label each stage with the date at which I observe they have mastered that stage.
 |
| This clip is to make the next blank page, easy to find. For them and me. |
 | |
| The next blank page. I move the clip after we conference about their picture/story. |
I am so tired! But I really wanted to share this. Hope you guys enjoy it!
Leave comments! :o)


